
Resume Alerts
With the Resume Alerts plugin, registered users on your site can create resume alerts based on searches (by keyword, location keyword, category, skills, or regions [with regions addon]) which are delivered by email either daily, weekly, fortnightly, or monthly.
Installation
To install this plugin, please refer to the guide here: https://wordpress.org/support/article/managing-plugins/#installing-plugins
Setup
To get this plugin working, first create a page and call it something along the lines of “Resume Alerts”. Inside the page content add the shortcode:
[resume_alerts]This will house the page where users setup and manage their alerts after becoming users of your site.
Note: This plugin handles the alerts page but not the registration flow. You should use WordPress core functionality for this and set up registration links/explanations for your users so they are aware of the alert functionality.
Once you have your page setup, you can head over to Resumes > Settings > Resume Alerts to configure the plugin’s settings.
- Alert Email Content – This option controls the content of your alerts emails. Emails are plain text.
- Alert Duration – Entering a number here will cause a users alerts to expire are X days. When expired, the user can login to their alerts page to re-enable them for another X days.
- Alert matches – Enable this to ensure that an email is only sent if resumes are found that match your alert. If this is disabled, an email will be sent every time the alert is checked, even if there are no matches.
- Alerts Page ID – Select the page where you have placed the [resume_alerts] shortcode, so the add-on knows where to link users to view their alerts.
Using Resume alerts
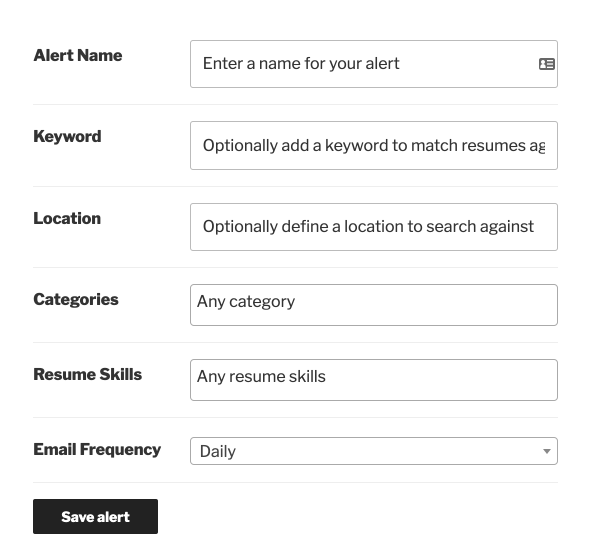
The job alerts page (which you setup above) will at first show a blank table as no alerts are configured. Click ‘add alert’ to begin. This will show the add alert form:
When you’ve setup your alert click ‘save’. It will then be activated and displayed in the table:
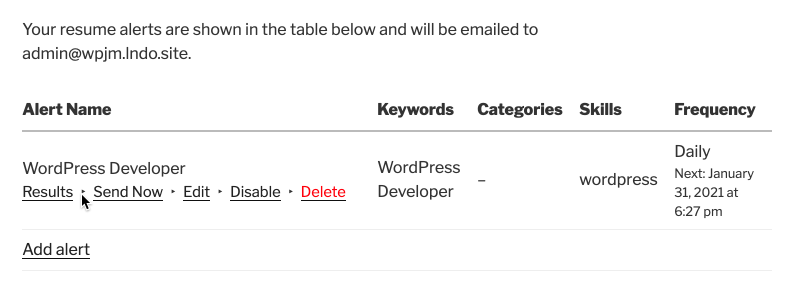
Hovering over an alert will give you the option to:
- Delete the alert
- Disable or enable the alert
- Preview the alert (view matching results) and
- Edit the alert
How alerts are sent
Once an alert is created (or enabled) a WordPress cron event will be scheduled. When this event is triggered, the alert will be sent and another cron will be scheduled. This process will repeat whilst the alert is active.
Ensuring cron jobs are triggered for low traffic sites
WP Cron jobs are triggered when the site is visited by a user or bot. If you want cron jobs to trigger more often or more reliably, consider this tutorial: https://tribulant.com/blog/wordpress/replace-wordpress-cron-with-real-cron-for-site-speed/
Emails aren’t getting sent
Ensure WP cron is not disabled. Check for this in your wp-config file:
define('DISABLE_WP_CRON', true);
If you see this, remove it!.
Wrong “from” email address
Alert emails are set up to be sent from “noreply@yourwebsite.com“
However, with some hosts, if this address doesn’t exist as a mail account on your server, then it may be replaced, so you will find alert emails being sent from an email address belonging to your hosting provider.
If this happens, you can fix it by creating a mail account with your host for “noreply@yourwebsite.com“
 WP Job Manager Field Editor
 Search and Filtering for WP Job Manager