
New Feature: Automatically output custom fields on Job/Resume Listing

With the release of WP Job Manager Field Editor version 1.1.8 a new feature has been included which now allows you to specify custom fields you want to automatically output on Job/Resume listings. You can still use the integrated Widget, PHP or Shortcodes to output the custom fields, but it is now a lot easier to do so and includes a few nice features that allow you to customize your site as you want. The plugin will only output and show whenever this field value is not blank, so if you have a field that is optional you do not have to worry about it showing the label with no value or any other invalid HTML.
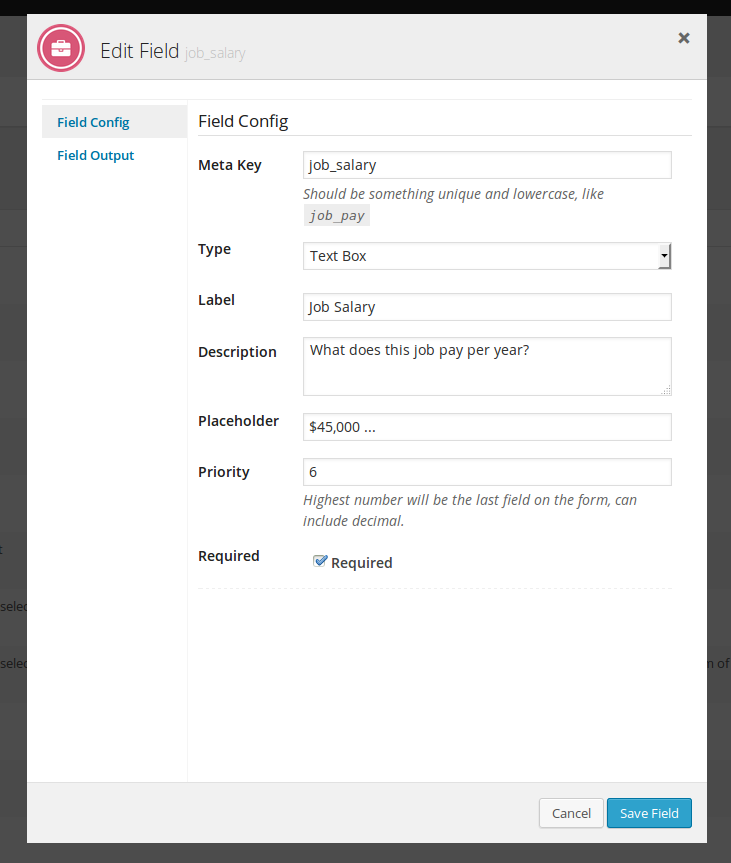
WP Job Manager Field Editor New Modal
New Modal Layout
When you update your version of the plugin to 1.1.8 you will see the modal for editing fields has a new look to it, and that is because it now includes what I like to call “tabs”, which allows a lot more room for customization, and adding new features. This is also the start of laying the groundwork for the new “tab” section for options that will provide much easier method of adding dropdown options (basically a couple fields with an add more button).
The new modal will look similar to the image on the left.
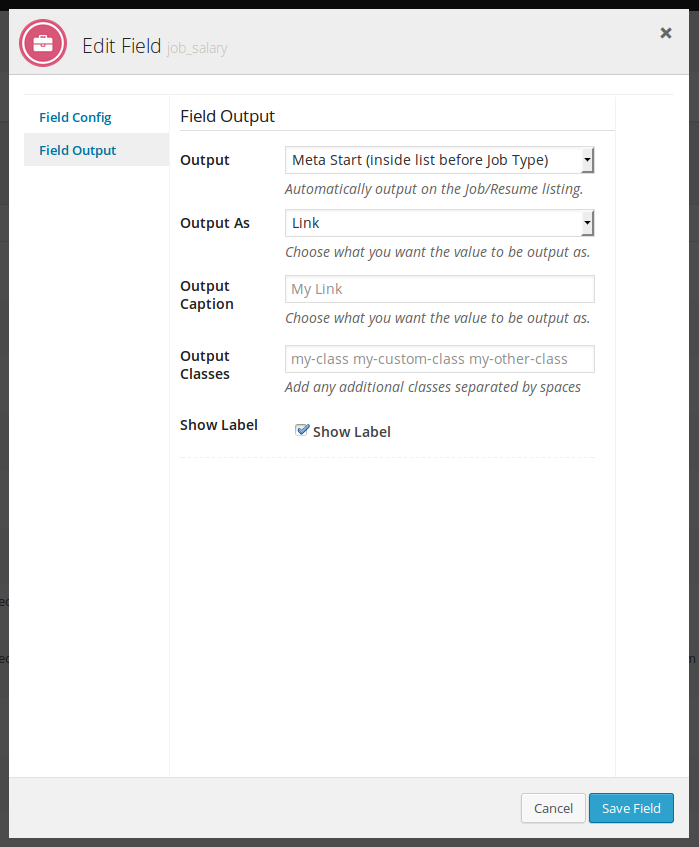
WP Job Manager Field Editor Field Output Tab
Field Output Tab
As you can see on the left of the new modal layout there is a Field Output tab you can click on (will only show for custom fields), this will show another configuration area where you can specify if you want this custom field to automatically output on the Job/Resume listing with a few options which I will go over below.
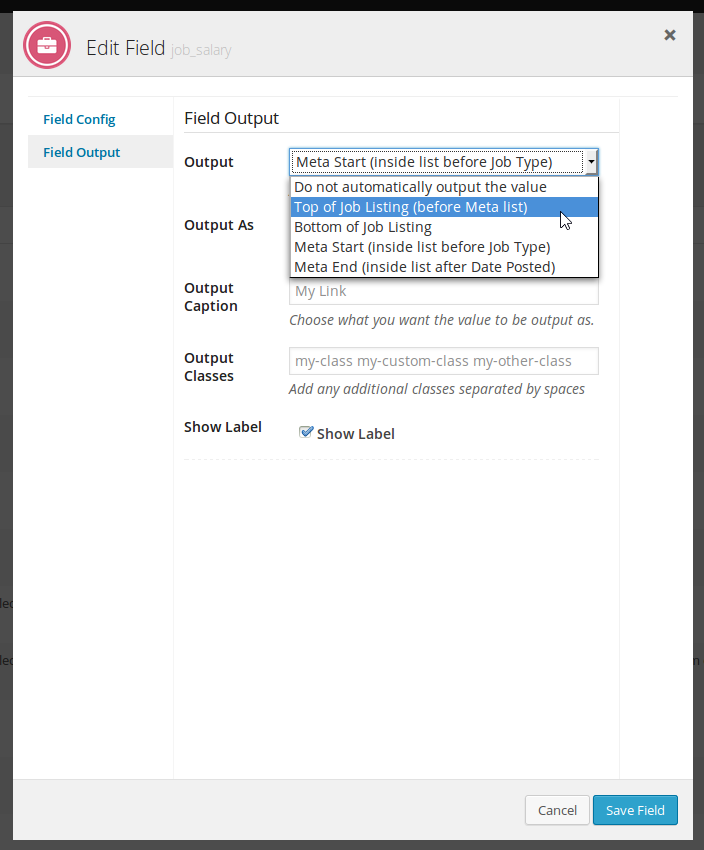
WP Job Manager Field Editor Choose Output
Field Output Location
In the first dropdown you will find all the available locations you can choose to automatically output the field value at. This will be the same for Job and Resumes and includes 4 different locations:
- Top of Job Listing (before meta)
- Bottom of Job Listing
- Meta Start (inside UL list before Job Type)
- Meta End (inside UL list after Date Posted)
To give you an understanding of these locations below is an example Job Listing with custom fields added in each one of the available locations:
WP Job Manager Field Editor Auto Output Areas
Styling Custom Fields on Job/Resume Listing
Because WP Job Manager Field Editor does not include any styles (which 99% of the time causes problems), the plugin relies on your theme or adding custom styles to get everything to appear exactly how you would want it to. Luckily I took this into consideration when adding this new features and as such there are standard wrapper and field divs that you can use to create your own CSS styles ( will probably add this as a feature in future release ).
Top/Bottom of Job Listing
Each custom field you set to automatically output on the job/resume listing will be wrapped in a <div> with 1 class and 1 ID.
The value from the custom field will be inside another <div> with 1 class and 1 ID. The syntax used for the <div> you can see below, the actual output will vary based on the field’s meta key, so using the syntax below FIELD_META_KEY will be whatever that field’s meta key is.
Wrapper DIV:
<div id="jmfe-wrap-FIELD_META_KEY" class="jmfe-custom-field-wrap">
Field Value DIV:
<div id="jmfe-custom-FIELD_META_KEY" class="jmfe-custom-field">
As an example, if you were to set a custom field with a meta key of job_salary to output at the top of the job listing, this is the HTML the plugin will automatically generate:
<div id="jmfe-wrap-job_salary" class="jmfe-custom-field-wrap">
    <strong>Job Salary:</strong>
    <div id="jmfe-custom-job_salary" class="jmfe-custom-field">
        $99,000
    </div>
</div>
You can also specify your own custom classes to add to the field value’s <div> which I will explain further below.
The <strong>Job Salary:</strong> is added only when Show Label is checked in the field configuration.
Meta Start/End Output
If you decide to pick to automatically output at meta start or meta end the ID and classes are exactly the same above except that instead of a <div> for the wrapper it will be an <li> wrapper. Below is an example of the automatically generated HTML for the same field from above, except this example would be either at meta start or meta end:
<li id="jmfe-wrap-job_salary" class="jmfe-custom-field-wrap">
    <strong>Job Salary:</strong>
    <div id="jmfe-custom-job_salary" class="jmfe-custom-field">
        $99,000
    </div>
</li>
This is because the meta locations are inside of the <ul class=”meta”> wrapper and in order to show correctly they must be added as <li> items.
Output As Options

WP Job Manager Field Editor Output As Options
As you can see in the image to the left there are currently 4 available output types (as of v1.1.8):
- Standard Value Output (regular text)
- Link
- Image
- oEmbed
Standard Value Output
This option is exactly as it sounds, it will output whatever the value is saved as. This will probably be the most common output and if you are unsure I recommend using this option.
Link
The link option will output the value inside a link HTML tag. So in the example from above instead of the value being inside a <div> it will be inside a link tag with the href value being set to whatever the value of the field is. This would be useful for upload field types, profile links, etc.
Selecting this option will also show another field Output Caption where you can specify the caption for the link. If a caption is not specified the URL will be used instead.
The link field is also useful for showing buttons, all you need to do is make sure your theme has CSS styles for buttons and simply add your own custom class in the Output Classes text box. Common CSS classes for buttons are button btn button-primary btn-primary and so on.
As an example, if I have a job_profile custom field with Show Label checked, Output Caption set as “Employer Profile”, and “button” set in the Output Classes, this is the HTML that would be generated. All links are set to open in a new window. The http://domain.com/profile comes from the value of the custom field for that job listing.
<div id="jmfe-wrap-job_profile" class="jmfe-custom-field-wrap">
    <strong>Job Profile:</strong>
    <a target="_blank" href="http://domain.com/profile" id="jmfe-custom-job_profile" class="jmfe-custom-field button">
        Employer Profile
    </a>
</div>
Image
Choosing the image option will use an <img> tag instead of <div> or <a> from the examples above. I would only recommend using this for file upload field types. Reason being is if you set a custom field of of textbox and the user provides the URL to the image, chances are the job/resume listing will show the image box with an X if the image or URL doesn’t exist. When the field type is an upload the file is on your server and will show correctly.
oEmbed
Using this option will attempt to generate the oembed HTML for things such as YouTube, SoundCloud, Vimeo, etc. This would be useful for showing videos or other embeded items that you may have your custom field for.
Say you provide a field for users to enter the URL to a youtube video, and want that video to show on the job listing. This would be the option to choose to embed the YouTube video on that listing page. There is a large number of sites that are supported, please see the WordPress Embeds page for more details. The plugin will check if the URL provided in this field value is valid and will only output the embed HTML when the URL is valid.
Show Label
The show label checkbox gives you the option to have the Label from that field to show in the output. If this field is checked the label will be shown with a colon after it.
 WP Job Manager Field Editor
 Search and Filtering for WP Job Manager
No comments yet.